Pinhole projector key facts for 22 July 2028
How do you make a pinhole projector?
The simplest version is two pieces of card. It takes five minutes and works on any sunny day, so you can practise before the eclipse.
You need: two pieces of stiff white card and a drawing pin. Foil and tape are optional.
- Make the hole. Push the pin through one card to make a round hole about 1 mm wide. For a cleaner hole, tape foil over a small window cut in the card and make the pinhole in the foil.
- Turn your back to the Sun.
- Hold up the pinhole card so the sunlight passes through the hole.
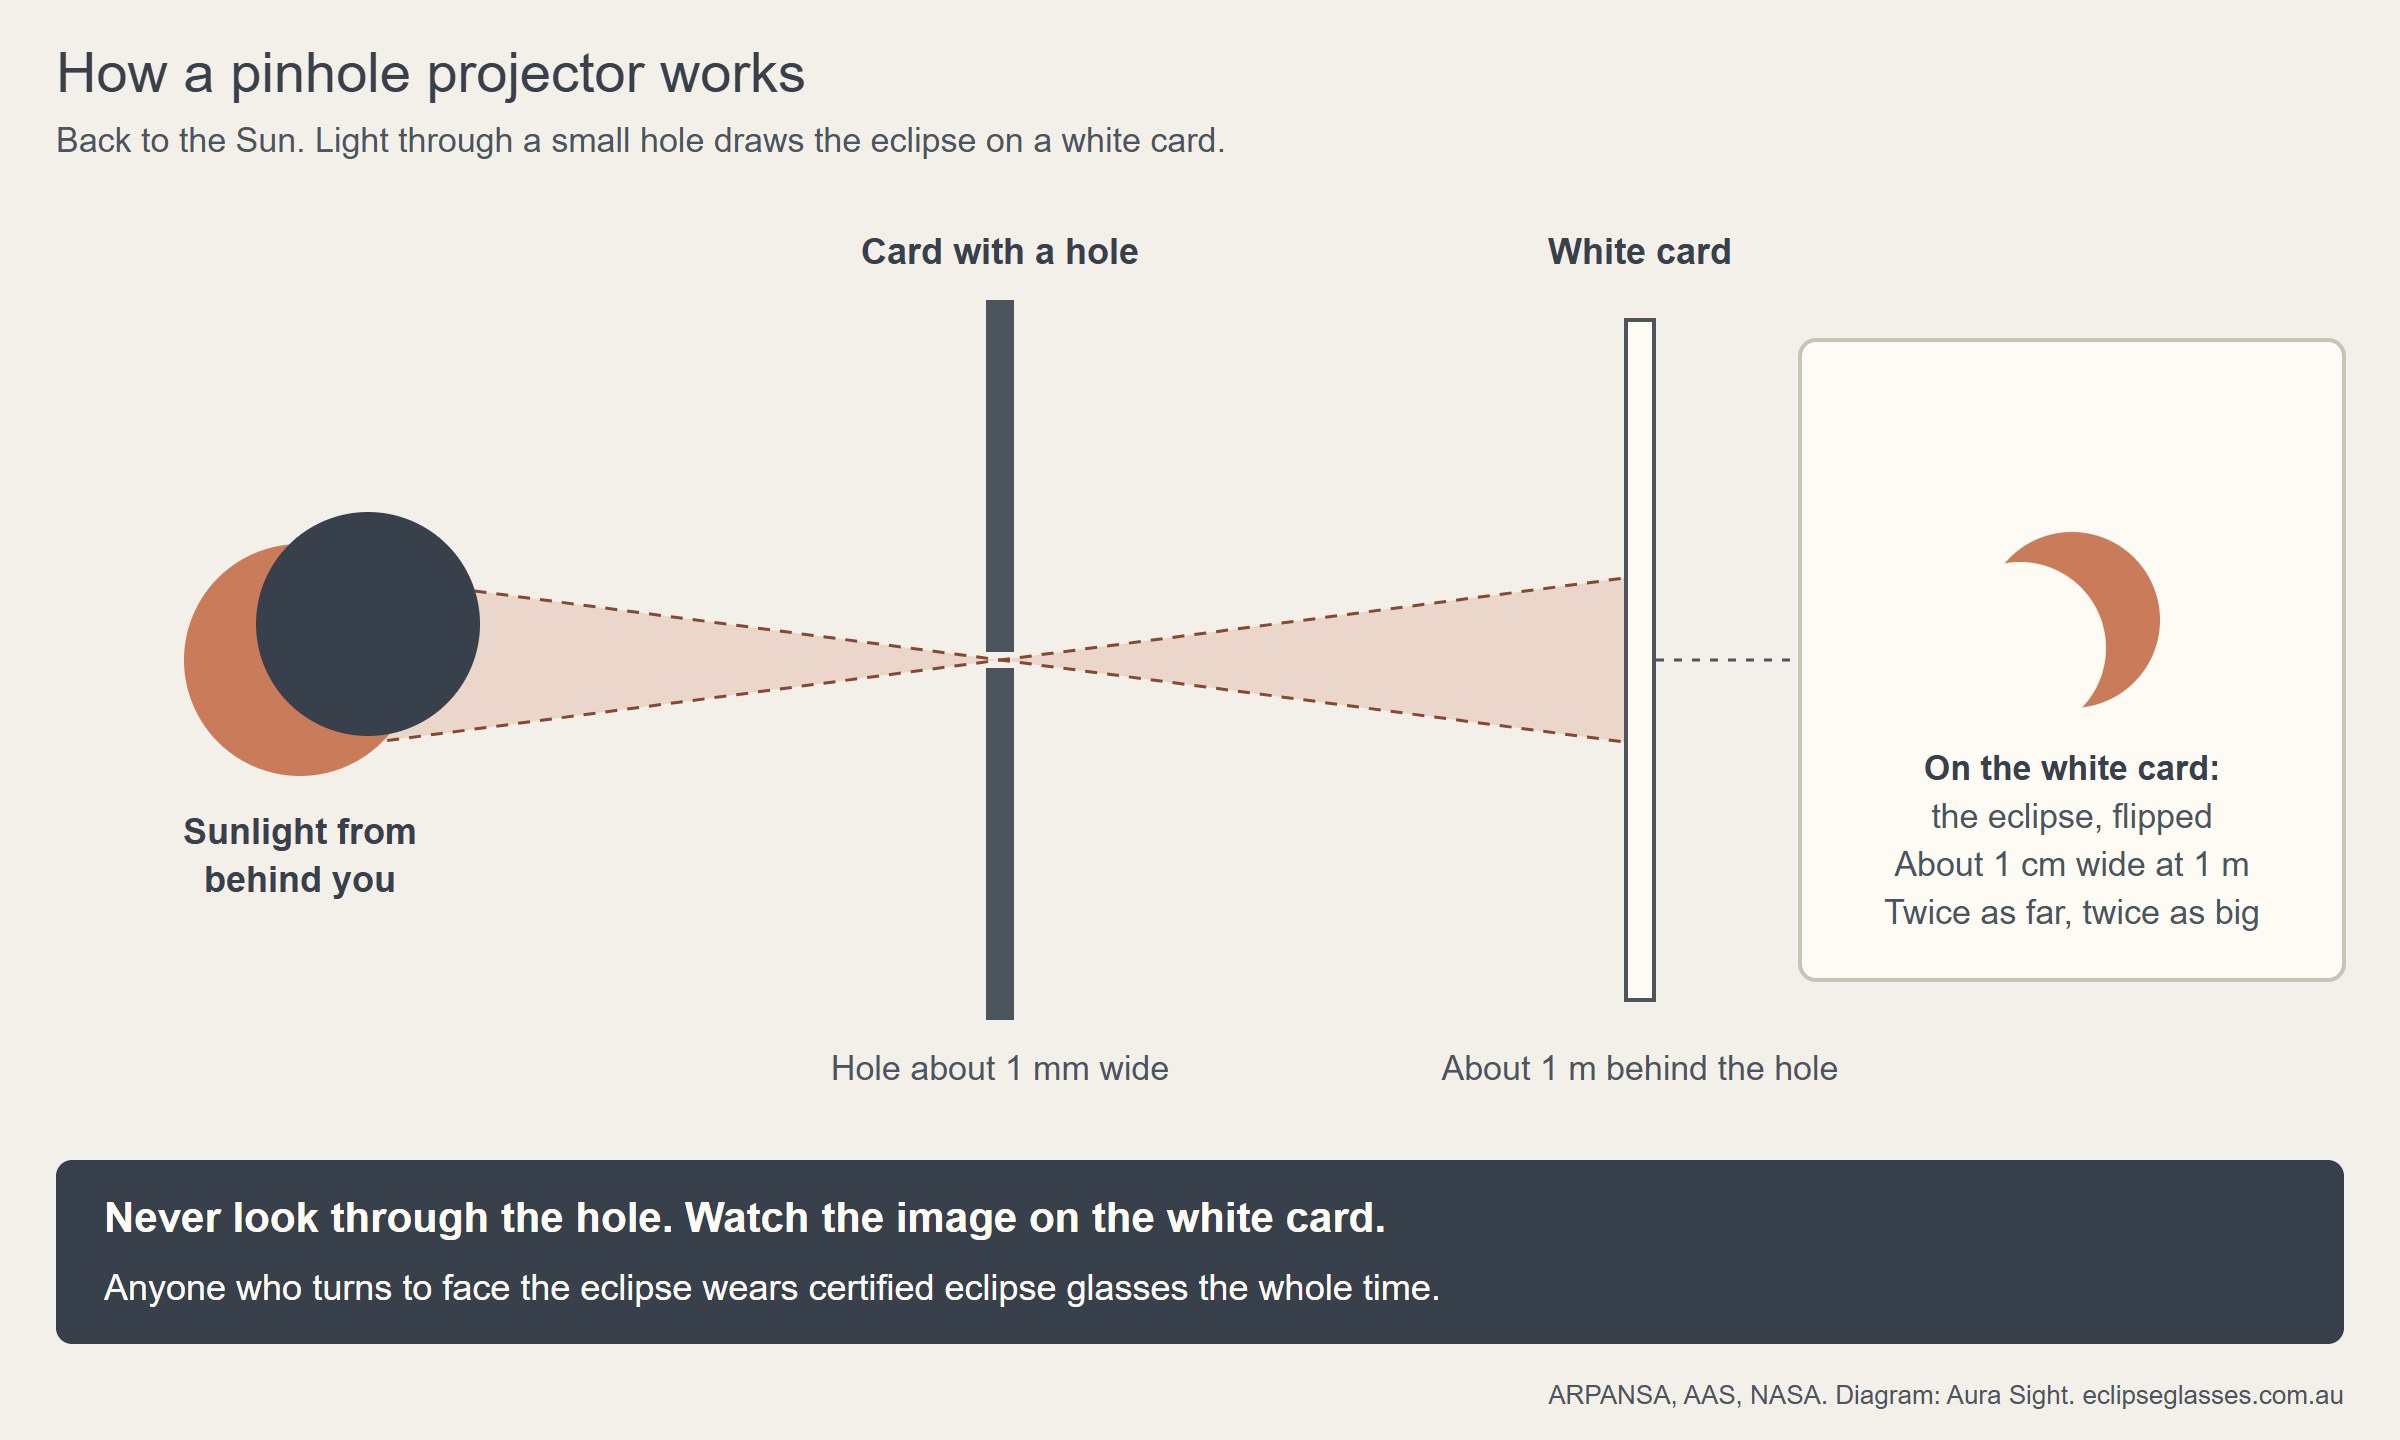
- Catch the light on the white card, about 1 m away in the shadow of the first card. The small bright circle on it is the image, and on eclipse day it shows the eclipse.
- Adjust the distance: further away for a bigger image, closer for a sharper one.
The one rule: never look through the hole. The hole is not a filter. You watch the white card.
How to make a cereal box pinhole projector
A box keeps stray light off the image, so it looks clearer. NASA describes this design: a pinhole in foil at one end of a box, paper inside to catch the image, and a second hole to watch it through.
You need: an empty cereal box, white paper, foil, tape, scissors and a drawing pin.
- Tape a sheet of white paper flat inside the bottom of the box.
- Tape the top shut and cut two squares about 3 cm wide in it, one near each end.
- Tape foil over one square and make one small hole in the foil. Leave the other square open to look into.
- With your back to the Sun, rest the box on your shoulder so sunlight falls on the foil.
- Look into the open square at the paper and tilt the box until a small bright spot lands on it.
A 30 cm box gives an image only about 3 mm wide. A taller box, such as a poster tube or two boxes taped end to end, makes it bigger.
How does a pinhole projector work?
Light travels in straight lines. Rays from the top and bottom of the Sun cross at the hole, so the image is upside down and back to front. Its size depends only on the distance from the hole to the white card: in July it is about 1/110 of that distance, so about 1 cm at 1 m. A smaller hole gives a sharper but dimmer image. ARPANSA's guide uses a hole about 1 mm wide and a distance of about 1 m.
What will you see on eclipse day?
Before the eclipse the projector shows a plain round dot. As the Moon moves across, a bite appears, the dot becomes a thinner and thinner crescent, then it fattens back into a circle.
Outside the path of totality the crescent is thinnest at the maximum: about 96% of the Sun is covered in Canberra, 81% in Brisbane and Melbourne, and about half in Perth. Inside the path, which includes Sydney, the image fades away during totality because there is too little light to project. Certified glasses stay on for anyone facing the eclipse, totality included. A projector needs direct sunshine, so a passing cloud ends the show.
Colanders, fingers and tree leaves
- A colander held over white card casts dozens of little crescents. The American Astronomical Society calls it a terrific pinhole projector.
- Crossed fingers in a waffle pattern cast a grid of small images on the ground.
- A leafy tree turns its round dappled spots into crescents during the eclipse.
These are shadows on the ground, watched with your back to the Sun. Glasses go on before anyone turns to face the eclipse.
Is a pinhole projector safe?
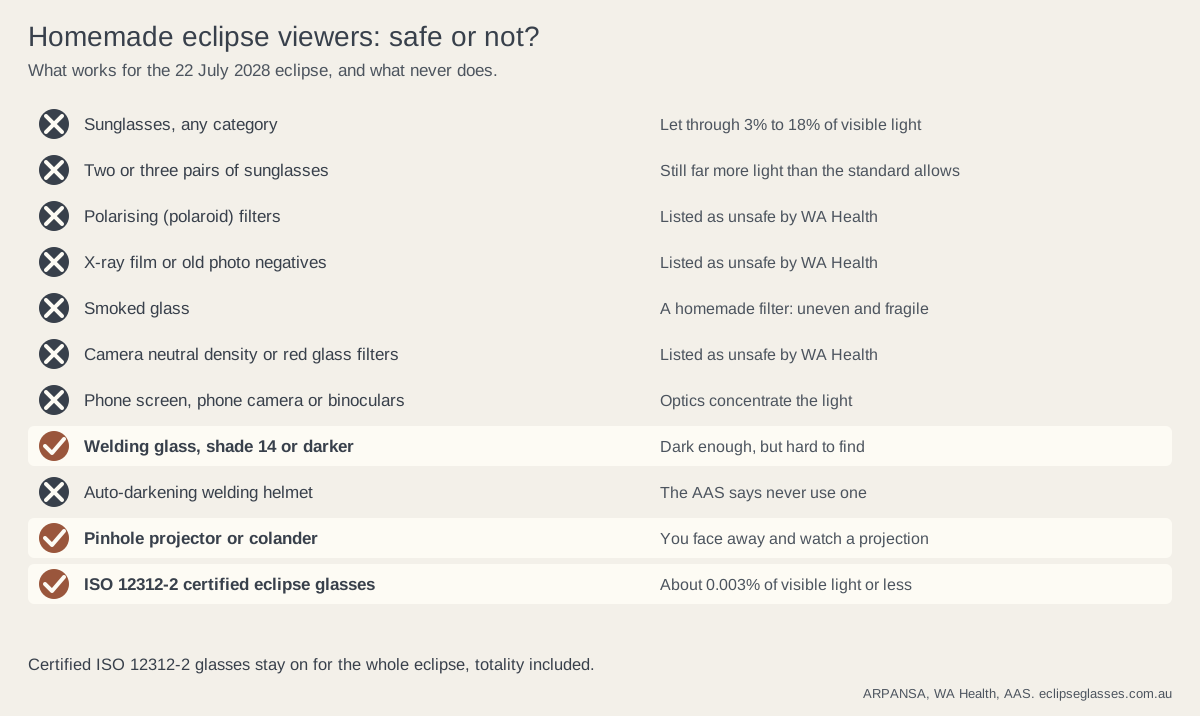
Yes, used the right way. ARPANSA rates indirect viewing such as pinhole projection as the safest way to watch an eclipse. Our guide to homemade eclipse viewers compares it with the methods that are not safe.
- Back to the Sun; watch the image on the card or ground.
- Never look through the pinhole, the colander or the box at the sky.
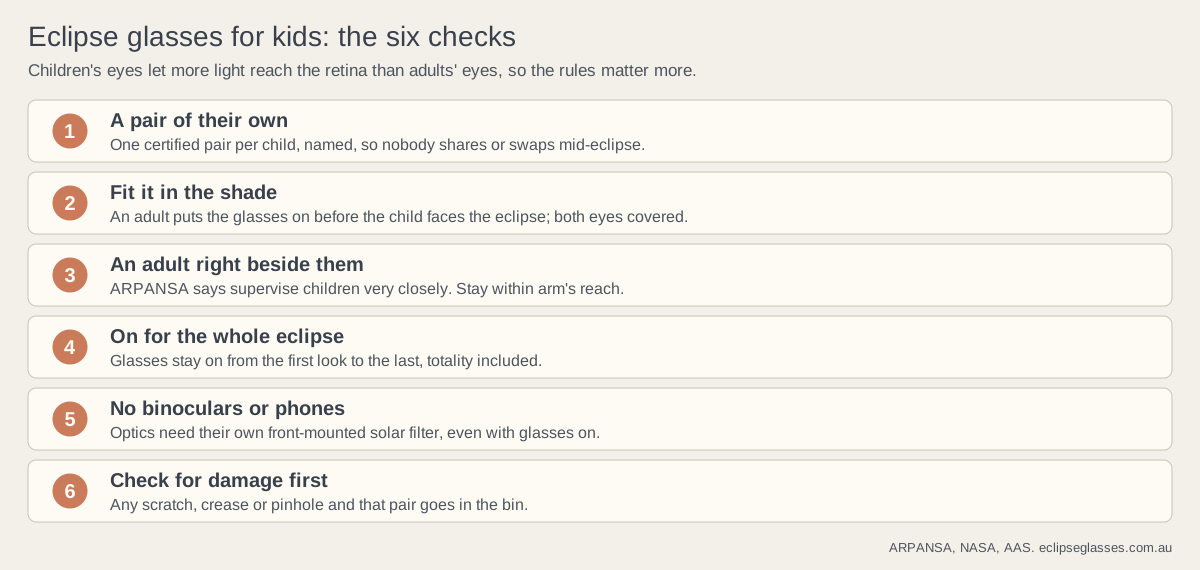
- Children use a projector with an adult close by.
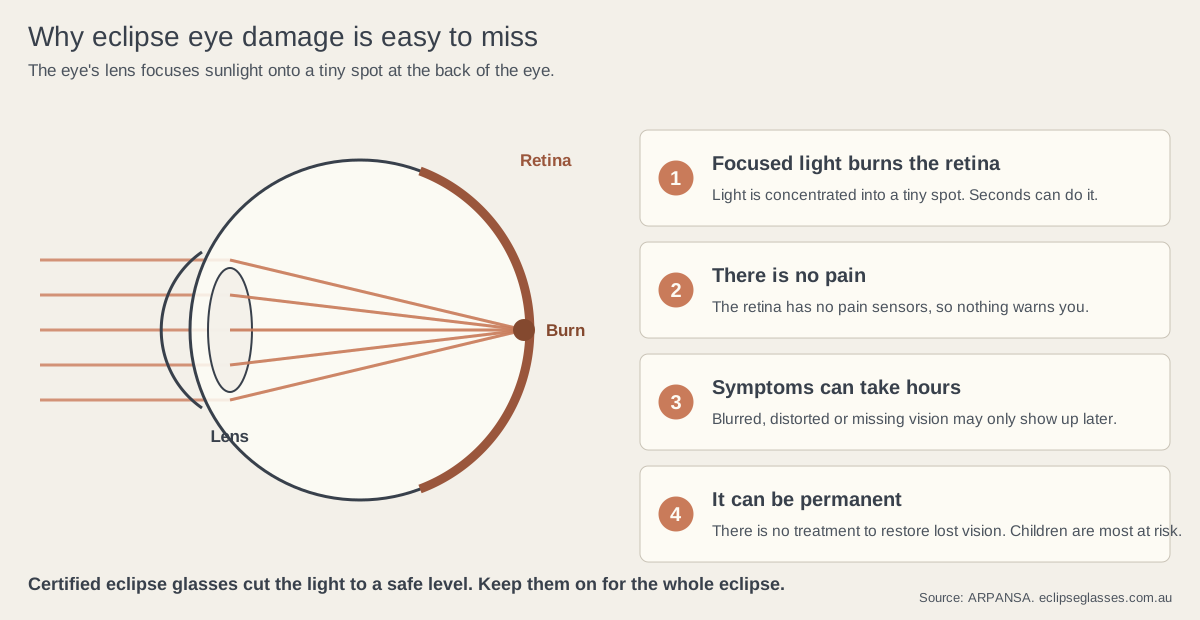
- Never use binoculars, a telescope or a camera as a projector. They concentrate sunlight, which causes immediate, severe eye damage.
Projector or glasses: which do you need?
Both, if you can. A projector is a fun activity and a backup, but the image is about a centimetre wide. Certified eclipse glasses let you watch the eclipse itself in the sky, and they stay on for the whole eclipse, totality included. Our certified eclipse glasses are A$5.45 a pair, and the family eclipse kit has four pairs and a printed viewing guide for A$19.25. For class ideas, see solar eclipse activities for kids and classrooms; for little ones, eclipse glasses for kids.
Pinhole projectors: questions
Can you look through a pinhole projector at the eclipse?
No. Never look through the pinhole. Stand with your back to the Sun and watch the image on white card. Anyone who faces the eclipse wears certified eclipse glasses.
How big should the hole in a pinhole projector be?
About 1 mm wide, made with a drawing pin, with the white card about 1 m away. A smaller hole gives a sharper but dimmer image.
How big is the image from a pinhole projector?
About 1/110 of the distance from the hole to the card: about 1 cm at 1 m, and about 3 mm in a 30 cm cereal box.
Does a pinhole projector work during totality?
No. During totality there is too little light to project. Certified glasses stay on for anyone facing the eclipse, totality included.
Do you still need eclipse glasses if you have a pinhole projector?
Yes, for anyone who turns to face the eclipse. Certified glasses let you watch the eclipse itself, and they stay on the whole time.
Sources
All checked 18.11.2026.
- ARPANSA, Solar eclipse (indirect viewing, the 1 mm hole and 1 m distance, supervising children).
- American Astronomical Society, Pinhole projection (colanders, crossed fingers, tree leaves, totality).
- NASA, Eclipse safety (the box projector).
- Eclipse times and coverage from our own calculations from NASA eclipse elements, as on the eclipse map. Image sizes are our arithmetic.
Glasses for everyone watching
ISO 12312-2 certified and lab-tested, with a QR batch certificate on every pair. The family kit has four pairs and a printed viewing guide.